A Battery is the most important part of a device like a laptop, a smartphone, or a tablet. Without the battery, you can not turn your device on especially if you take it out of the house. The battery is the power source for almost all devices. As you know, a laptop, a tablet, or a smartphone uses a rechargeable battery. If the battery power is exhausted, you must recharge it.
If you have a laptop that uses Windows 10 operating system, you can check the condition of your laptop battery with a simple and easy way. You just need to click a battery icon in the taskbar of your Windows 10 to get the information about the percentage of the battery power and approximate duration of usage. But if you want more information about it, Windows 10 also has a feature to generate the detailed report about the laptop battery.
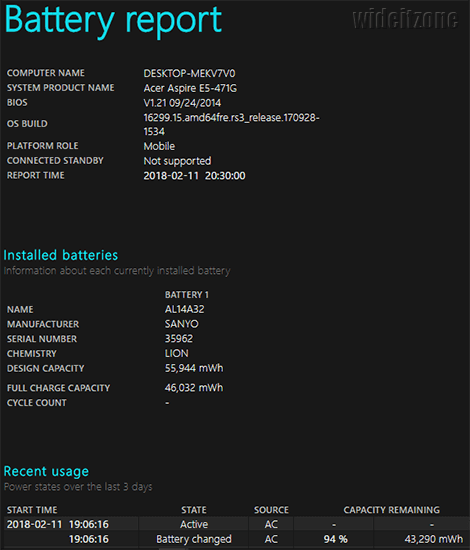
The detailed report generated includes the concise information of the laptop, the installed battery, the current usage, the graph of the battery usage for 3 days, the battery history, the battery capacity history, the estimated battery life, and so on. The detailed report of the laptop battery can be generated with the powercfg command and the result is in the form of an HTML file. Then you can use your web browser to open this file.
Use Windows+X key combination to access the WinX menu (1) and then select Command Prompt (Admin) (2).

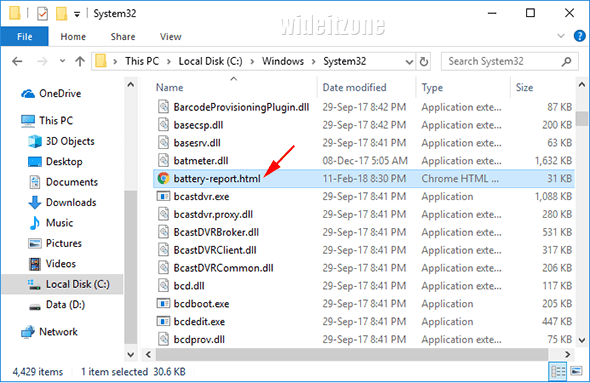
In the Administrator: Command Prompt window that appears, type the powercfg /batteryreport command (1) and then press the Enter key. This command creates the battery report in the form of the HTML file and saves it in the system32 folder (2).

Open File Explorer and then find the battery-report.html file. Double-click the file to open it in your default browser.
Now you can view the detailed report of your laptop battery.